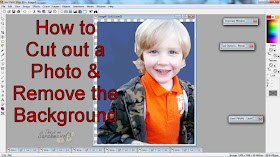
So This tutorial will show how to cut out a section from a photograph and remove the background. To see the images full size please click on them.
The program I am using is Paint Shop Pro version 7, but many photo editing software packages work on very similar principles.
Right, so start off by opening the image you wish to work with, into Paint Shop Pro, (use the File option along the top)
Then look at the tool menu down the left hand side, and you will see a lasso shaped icon. This is the selection tool. If you click on the Lasso icon, then look over at the tool options you will see a 'selection type' drop down menu if you click the little arrow, you will see three options, freehand, point to point and smart edge.
The option I use is point to point as I find this works the best, so select that from the list. You will also notice there is a 'feather' option. This effects how much blur you wish for your cut out edge to have, if you want a very sharp clean cut select the feather to 0, if you want are cutting out people it is normally good to have a slight feather, I normally select around 3. Try what suits you best.
Once you have clicked point to point around your subject, double click to finish the selection process, and your end point will join up t the starting point, you will then see marching ants highlight around your cut out area, if you are happy with the position of the selection then you can 'cut out' your subject.
To do this go to Edit on the Top menu bar, and select 'cut'
Then you will see the selected area removed, and normally a yellow background is visible instead.
Now you want to put your cut out selection into its own new image, so go to Edit again along the top menu bar, and this time select Paste, then 'Paste As New Image' and your selection will be pasted onto a new image.
You can now close your original Photo, by using the red cross in the top right hand corner of the image.
But Please note to select NO when it asks if you would like to save changes, otherwise you will save over your original photo on your hard drive with a yellow cut out!
Now you have a new image with the background removed, you can use the basic shape maker tool to add a plain background if you wish, and use your new cut out photo to incorporate into any designs.
Hope this is some help, if you have any questions please feel free to ask and I'll do my best to answer them.


No comments:
Post a Comment